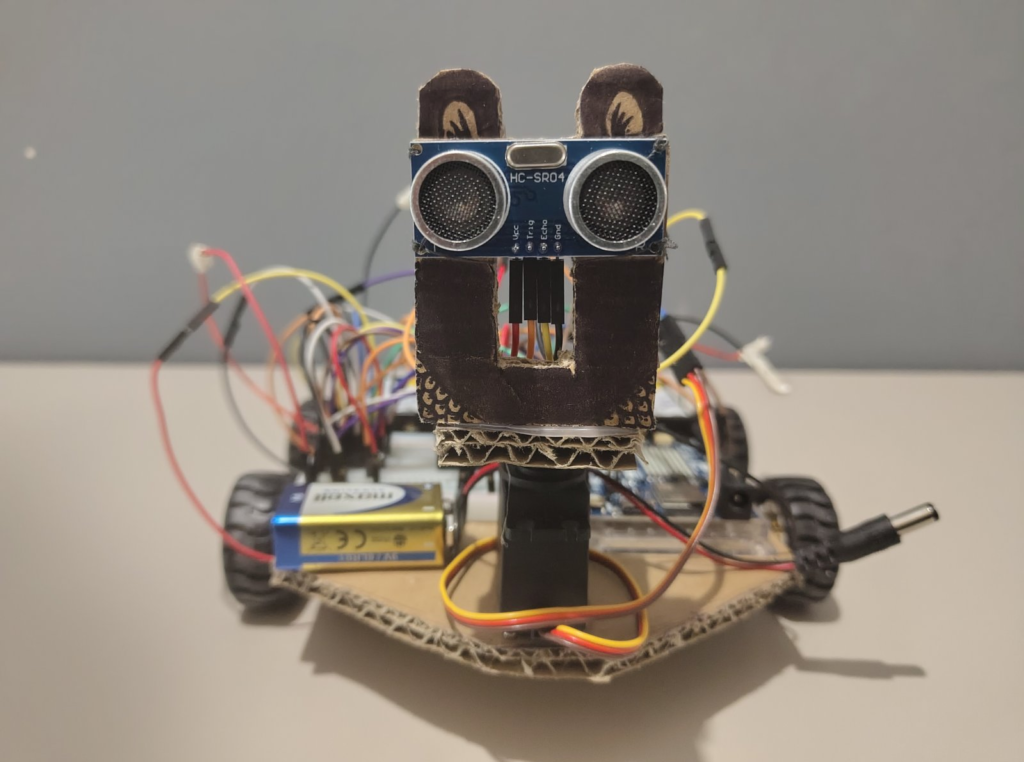
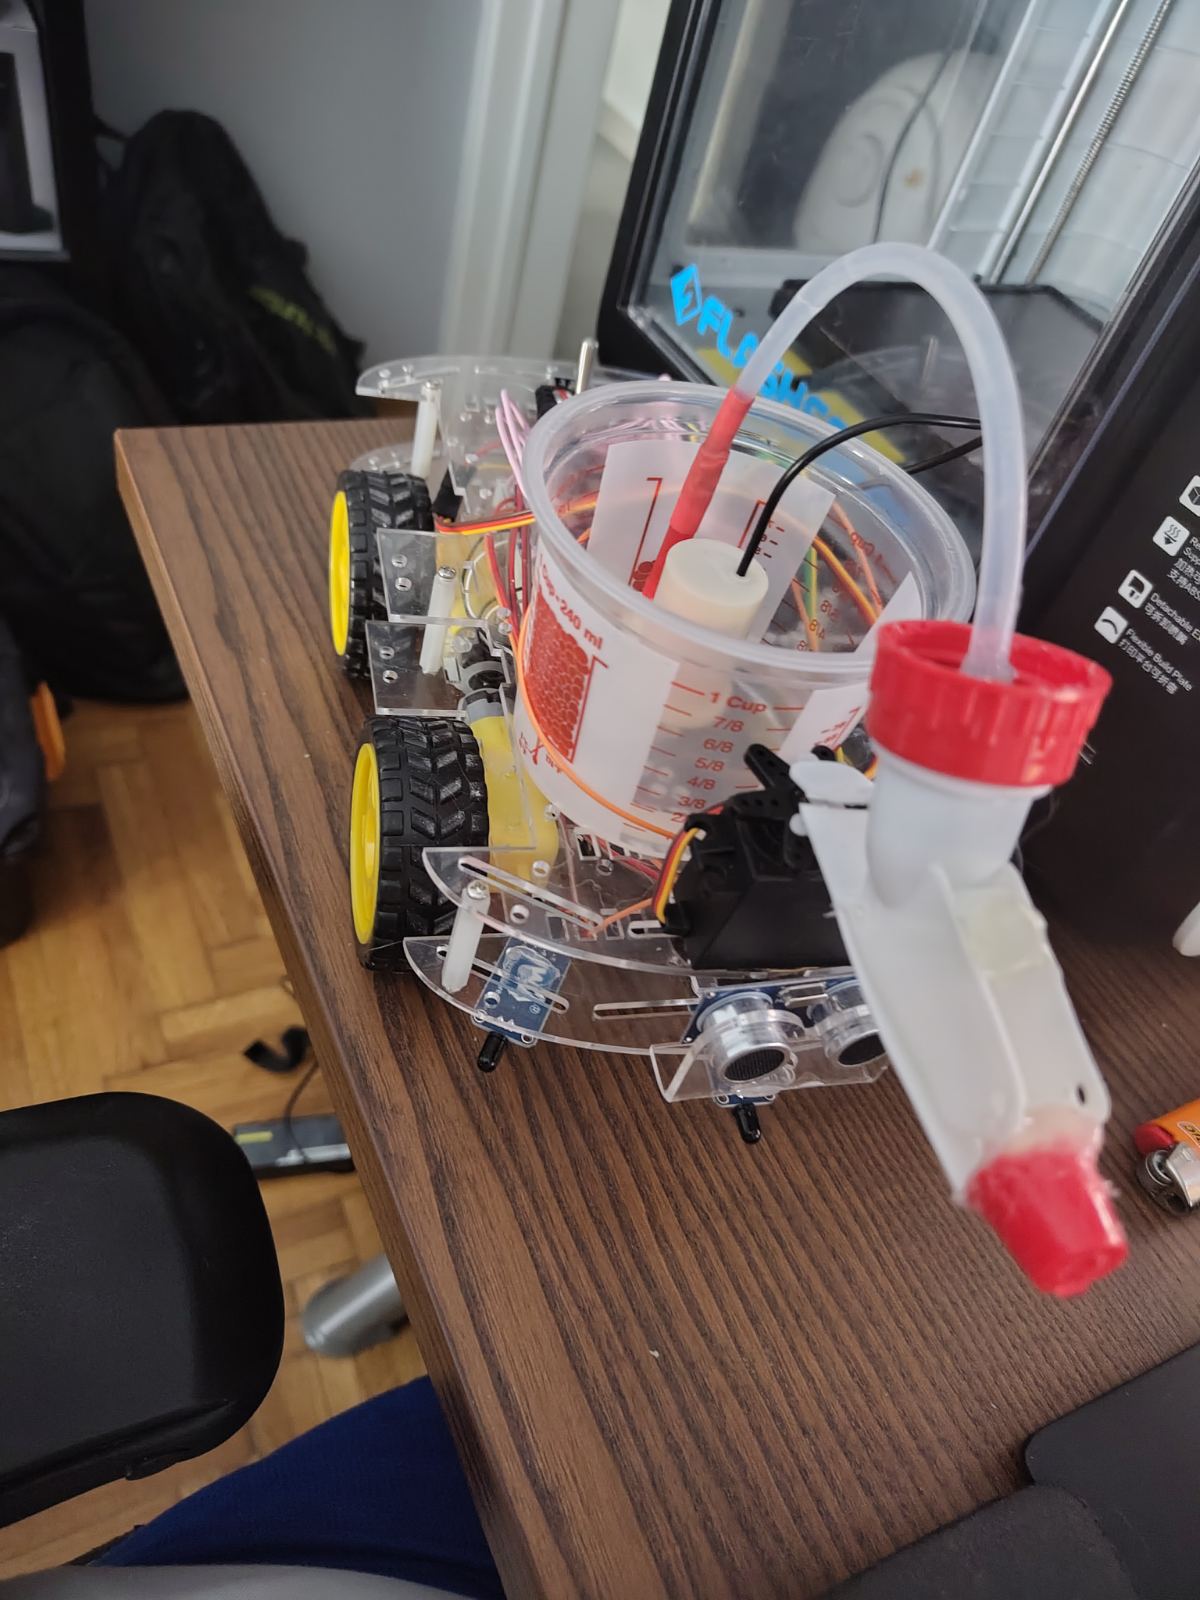
Most robot projects are content to sense the world and roll around in it. Plitsbot has a slightly more dramatic job description: find a fire, drive at it and put it out with a water pump on a servo-mounted hose. It’s a 4WD Arduino UGV that does four things in a strict order:
- Watches three infrared flame sensors while sitting still.
- Turns in place toward whichever sensor lights up.
- Approaches the flame, measuring distance with an ultrasonic sensor.
- Extinguishes it, pump on, hose sweeping, until the fire is gone, then returns to idle.
That’s it. No fancy path planning, no PID, no interrupts. Just a clean state machine and a handful of well-behaved functions. The whole thing was built and simulated in Autodesk Tinkercad first, which is where most of the interesting bugs got caught before any real water touched any real electronics, always the correct order of operations.
This tutorial walks through the build the way the code is actually organized: hardware first, then power, then the behavior loop, then the functions that make it all move. Along the way we’ll stop on the decisions that aren’t obvious from the code, because those are the ones worth understanding.
1. What you’re building
Plitsbot is a finite behavior loop wearing a chassis. At any moment it’s in one of four states, and it can only move between them in one direction:
| State | What’s happening |
| Idle | Sitting still, polling the three flame sensors. |
| Align | A side sensor saw flame, so the robot tank-turns toward it until the center sensor sees it too. |
| Approach | Driving straight forward, checking distance every loop, until it’s ≤ 50 cm from the fire. |
| Extinguish | Stopped. Pump running, hose sweeping 60°–120°, until the center sensor stops seeing flame. |
The key mental model: the center sensor is the source of truth. Side sensors only exist to point the robot in roughly the right direction. Once the flame is centered, everything downstream, approach, distance check, extinguishing, keys off that one sensor. If it ever loses the flame, the robot bails back to idle and re-aligns on the next pass. Simple and hard to confuse.
2. The hardware
| Component | Qty | Why it’s here |
| Arduino UNO R4 WiFi | 1 | The brain. 5 V logic, plenty of digital I/O. |
| HC-SR04 ultrasonic sensor | 1 | Measures how close the fire is. |
| MG996R servo | 1 | Aims the water hose. |
| IR flame sensor (LM393) | 3 | Left / center / right fire detection. |
| DC gear motor (TT) | 4 | One per wheel, 4WD. |
| L293D H-bridge IC | 3 | Two drive the motors, one drives the pump. |
| Mini submersible water pump | 1 | Pump the water. |
| 100 nF ceramic capacitor | 3 | Decoupling across each L293D. |
| Bulk electrolytic capacitor | 1 | Smooths the motor supply rail. |
| 2 × 18650 Li-ion holder | 1 | Powers the motors. |
| 9V battery | 1 | Powers the Arduino. |
| Chassis, wheels, wires, tank, spray system | 1 set | Everything that makes it a vehicle. |
Three things in this list deserve a second look.
Three L293Ds, not one. A single L293D is a dual H-bridge, two motors’ worth. Plitsbot has four drive motors plus a pump, which is more channels than one chip has. The trick (covered in section 4) is that the four drive motors don’t actually need independent control, so two chips wired in parallel handle all four. The third chip is a glorified on/off switch for the pump.
Two capacitor types, two jobs. The 100 nF ceramics are decoupling caps, they sit right next to each L293D to soak up the high-frequency noise motors spew every time they switch. The bulk electrolytic sits across the battery rail to handle the big, slow current surges when motors start. Different problems, different capacitors. Don’t substitute one for the other.
A servo carrying a hose. The MG996R isn’t steering anything, it’s holding the water hose and waving it back and forth during extinguishing. Metal-gear servo because it’s doing real mechanical work against a wobbling water line, and plastic gears lose that argument eventually.
3. Power: two rails, one ground
This is the part people get wrong, so it goes early. Plitsbot has two separate power layers that share a single common ground:
- 5V logic layer: the Arduino, HC-SR04, servo, flame sensors, and VCC1 of all three L293Ds. This is the “thinking” power.
- 6V motor layer: the 18650 pack feeding VCC2 of the three L293Ds. This is the “muscle” power.
Why split them? Motors are electrically loud. When four of them start at once, they drag the supply voltage down and dump noise back onto whatever they’re connected to. If your Arduino and your sonar share a rail with that chaos, you get random resets and garbage distance readings. Keeping logic on its own clean 5V rail keeps the brain calm while the muscles do their thing.
The one non-negotiable: all grounds must connect. Logic ground and motor ground join into one common GND network. An H-bridge control signal is meaningless unless the chip and the Arduino agree on what “ground” is, the signal is a voltage relative to ground and if the two sides don’t share a reference, the L293D can’t read the Arduino’s intent. Two power rails, yes. Two grounds, never.
4. Wiring the motors: four wheels, four pins
Here’s the clever bit of the whole build. Four drive motors, but only four control pins drive all of them.
The two motor L293Ds (chip #1 for the front wheels, chip #2 for the rear) are wired in parallel, same Arduino signals go to both chips. So when you tell “the left side” to go forward, both left wheels get the identical command, front and rear. You’re not controlling four motors, you’re controlling two sides.
const int RIGHT_IN4 = 4;   // right side, (-) direction input
const int RIGHT_IN3 = 5;   // right side, (+) direction input
const int LEFT_IN2  = 6;   // left side, (-) direction input
const int LEFT_IN1  = 7;   // left side, (+) direction input
const int EN_RIGHT  = 9;   // EN3,4 of both chips, held HIGH
const int EN_LEFT   = 10;  // EN1,2 of both chips, held HIGH
Two pins per side (a (+) and a (-) direction input), which is exactly what tank-style steering needs:
- Both sides forward: drive straight.
- Left backward, right forward: spin left in place.
- Left forward, right backward: spin right in place.
That last pair is the tank turn and it’s why Plitsbot can pivot toward a flame without needing room to arc around. No steering geometry, no Ackermann anything, just run one side against the other.
The two EN (enable) pins are held permanently HIGH:
digitalWrite(EN_LEFT, HIGH);
digitalWrite(EN_RIGHT, HIGH);
The enable pin on an L293D is what you’d normally feed a PWM signal to for speed control. Plitsbot doesn’t want speed control, it wants motors that are either on or off. So the enables get tied high once in setup() and forgotten. Direction is controlled entirely through the IN pins. It’s the simplest possible motor scheme and for a robot whose entire job is “point at fire, go,” simple is correct.
5. Reading the flame sensors
Each LM393 flame sensor outputs a digital signal and here’s the catch that trips everyone up: it’s active-LOW. LOW means flame. HIGH means no flame. Backwards from what your intuition expects.
Rather than sprinkle == LOW comparisons through the code and pray you never mix one up, Plitsbot isolates the polarity in a single named constant:
const int FLAME_ACTIVE = LOW; // sensor level meaning "flame"And every flame check goes through one tiny function:
boolean flameAt(int sensorPin)
{
  return (digitalRead(sensorPin) == FLAME_ACTIVE);
}
Now the entire codebase asks “is there flame at this pin?” in plain English and the weird active-LOW detail lives in exactly one place. Swap in an active-HIGH sensor someday? Change one line, FLAME_ACTIVE = HIGH, and every check updates automatically. This is the difference between a project you can maintain and a project that maintains a grudge against you.
6. Measuring distance without freezing the robot
The HC-SR04 works by the classic recipe: fire a 10 µs trigger pulse, then time how long the echo takes to come back. Distance is proportional to that time.
long readDistanceCm(void)
{
  long echoTime;
  long distance;

  /* transmit a clean 10 us trigger pulse */
  digitalWrite(TRIG_PIN, LOW);
  delayMicroseconds(2);
  digitalWrite(TRIG_PIN, HIGH);
  delayMicroseconds(10);
  digitalWrite(TRIG_PIN, LOW);

  /* read the echo pulse and convert it to centimetres */
  echoTime = pulseIn(ECHO_PIN, HIGH, 25000);   // 25 ms time-out
  if (echoTime == 0)
  {                          // no echo received
    distance = 400;          // treat as maximum range
  }
  else
  {
    distance = echoTime / 58;   // us to cm conversion
  }
  return distance;
}
Two decisions here are doing quiet, load-bearing work.
The 25 ms timeout on pulseIn(). Without a timeout, pulseIn() blocks forever waiting for an echo that might never arrive, point the sonar at open air or a soft surface and it just… waits. That would freeze the entire robot mid-approach. The 25000 third argument caps the wait: if no echo comes back in 25 ms, pulseIn() gives up and returns 0. The loop keeps breathing. Never call pulseIn() without a timeout on a robot that has anything else to do.
Mapping a timeout to 400 instead of 0. When the sensor times out, the honest raw value is 0 but 0 cm would read as “there’s a wall pressed against my face,” which is the opposite of the truth. No echo almost always means nothing is close enough to bounce a signal back, i.e. open space. So the code maps the timeout to 400 (the sensor’s max range), “the way ahead is clear.” This flips a misleading 0 into a sensible reading and stops the robot from slamming to a halt every time the sonar catches a bad bounce.
The / 58. Sound travels ~343 m/s, the echo makes a round trip, and after the unit conversions that all collapses into “microseconds ÷ 58 = centimeters.” It’s the standard HC-SR04 magic number. You don’t need to re-derive it, but now you know it isn’t arbitrary.
7. The extinguishing routine
Once the robot is stopped 50 cm from a centered flame, extinguishFire() takes over:
void extinguishFire(void)
{
  setPump(HIGH);                     // start spraying water

  /* sweep the hose until the flame is out */
  while (flameAt(FLAME_MID_PIN))
  {
    hoseServo.write(SWEEP_LEFT);     // sweep to the left limit
    delay(SWEEP_DELAY);
    hoseServo.write(SWEEP_RIGHT);    // sweep to the right limit
    delay(SWEEP_DELAY);
  }

  setPump(LOW);                      // flame is out: stop the pump
  hoseServo.write(SERVO_CENTER);     // hose back to center
}
The logic is a while loop tied directly to the center flame sensor: keep spraying and sweeping as long as the flame is still there. No fixed spray duration, no guessing, the fire itself decides when the loop ends. The moment flameAt(FLAME_MID_PIN) reads false, the loop exits, the pump stops, and the hose re-centers.
The sweep sends the hose to 120°, waits, sends it to 60°, waits, repeats. The SWEEP_DELAY of 300 ms between endpoints matters: a servo can’t teleport, and water needs a moment to actually reach where you’re pointing it. Sweep too fast and you’re just waving a hose around spraying the gaps. The delay is the difference between fighting a fire and misting it.
Everything the routine touches is a named constant up top:
const int SERVO_CENTER = 90;    // hose pointing straight ahead
const int SWEEP_LEFT   = 120;   // hose sweep left limit
const int SWEEP_RIGHT  = 60;    // hose sweep right limit
const int SWEEP_DELAY  = 300;   // ms between sweep end-points
Want a wider sweep or a slower one? Change a number, not a behavior. This is the same discipline as the FLAME_ACTIVE constant, pull every “magic number” out of the logic and give it a name, so tuning is editing and not surgery.
8. The behavior loop: putting it together
Here’s where the four states live. Arduino’s loop() runs forever, and each pass walks the state machine top to bottom:
void loop()
{
  /* idle: stand still and watch the three flame sensors */
  if (!flameAt(FLAME_LEFT_PIN) && !flameAt(FLAME_MID_PIN) && !flameAt(FLAME_RIGHT_PIN))
  {
    stopMotors();
    return;                    // nothing burning - stay idle
  }

  /* align: turn in place until the center sensor sees the flame */
  if (!flameAt(FLAME_MID_PIN))
  {
    if (flameAt(FLAME_LEFT_PIN))
    {
      turnLeft();              // flame is to the left
    }
    else
    {
      turnRight();             // flame is to the right
    }
    while (!flameAt(FLAME_MID_PIN))
    {
      ;                        // keep turning until centered
    }
    stopMotors();
  }

  /* approach: drive forward while the center sensor holds the
   * flame, until the sonar reads STOP_DIST_CM or closer */
  moveForward();
  while (flameAt(FLAME_MID_PIN))
  {
    if (readDistanceCm() <= STOP_DIST_CM)
    {
      stopMotors();
      extinguishFire();        // pump + hose sweep until out
      return;                  // back to idle state
    }
  }

  /* flame lost during approach: stop and return to idle; if a
   * side sensor still sees it, the next loop pass re-aligns */
  stopMotors();
}
Read it top to bottom and the whole robot falls out of the structure:
The early return in idle is the load-bearing move. If nothing is burning, the function stops the motors and bails immediately, no aligning, no approaching, no wasted logic. Every loop pass starts by asking “is there even a fire?” and if not, does nothing. This is a robot that’s genuinely lazy until it has a reason not to be, which is exactly what you want from something carrying a water tank.
Align uses a blocking while loop, while (!flameAt(FLAME_MID_PIN)) ;, that just spins until the center sensor catches the flame. It’s a busy-wait: the robot commits to turning and does nothing else until it’s pointed right. For a machine with one job and one flame, that’s fine. (If you later wanted Plitsbot to keep checking its sonar while turning, this is the first thing you’d rewrite, but for now, blocking keeps the logic dead simple.)
Approach keys off the center sensor too. The while (flameAt(FLAME_MID_PIN)) means “drive forward as long as I can still see the fire.” Lose the flame mid-approach, robot drifted, fire moved and the loop exits, stopMotors() runs at the bottom, and next pass the whole machine re-evaluates from idle. The flame never gets away; it just triggers a re-alignment.
The distance check lives inside the approach loop, not the other way around. The robot only cares about distance while it’s actively approaching a flame it can see. The moment either condition fails, too close or flame lost, it acts. Nesting it this way means the sonar isn’t running the show; the flame is. Distance is just the trigger for “stop and spray.”
9. Plits, Plits, Plitsbot!
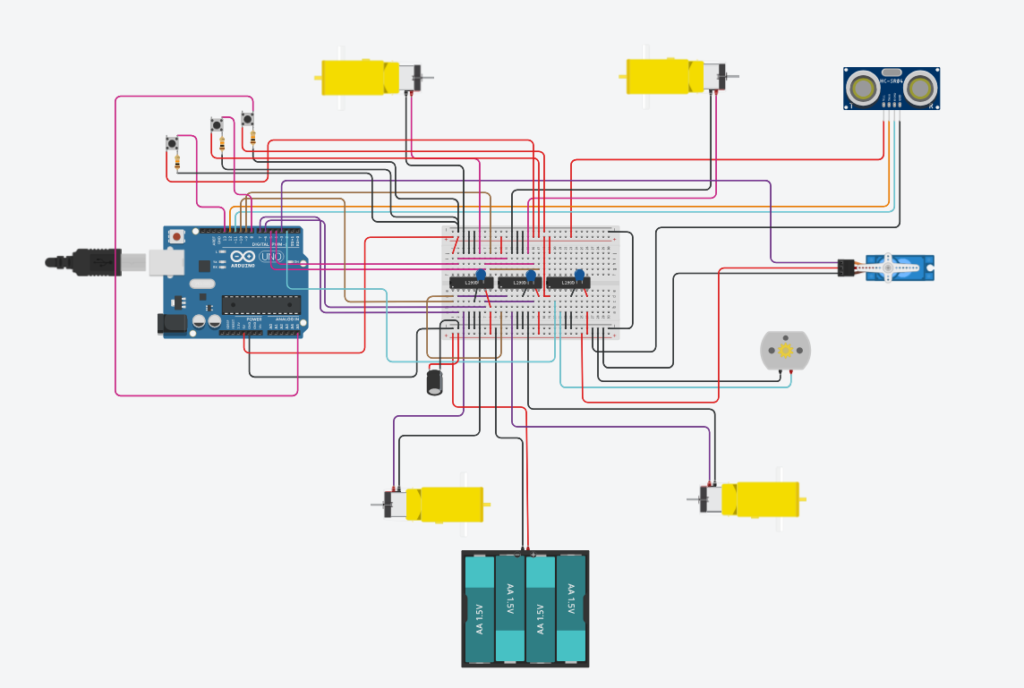
This is the Tinkercad schema. Notice, that we used push-buttons instead of flame sensors.
Let’s see the actual build.
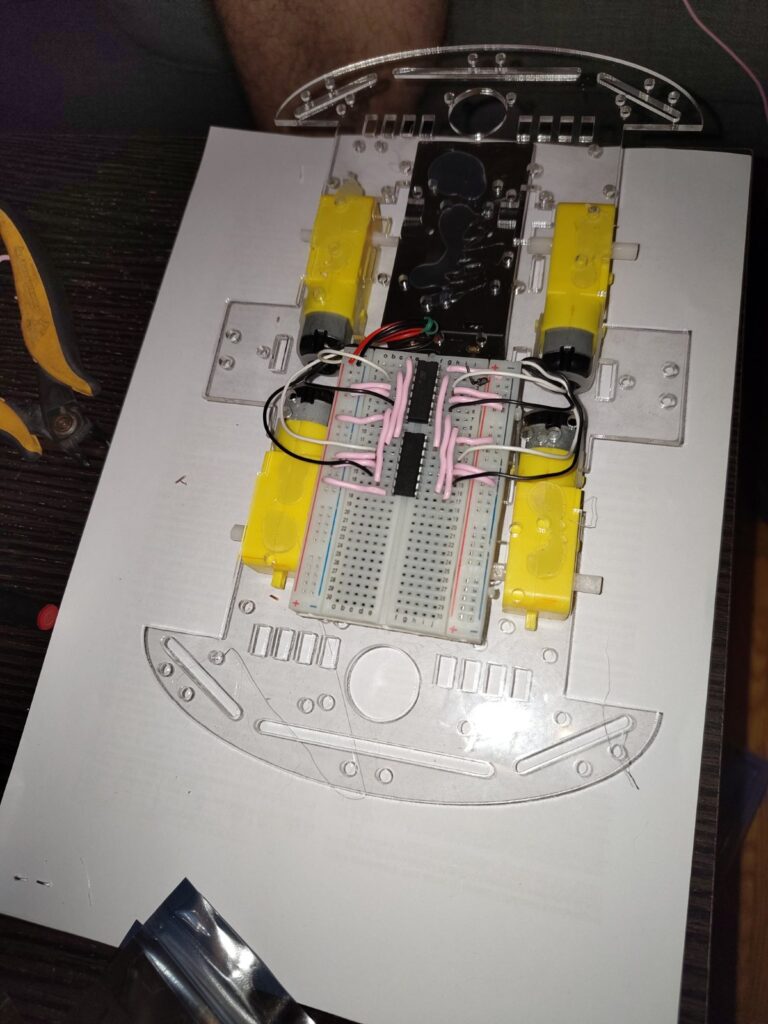
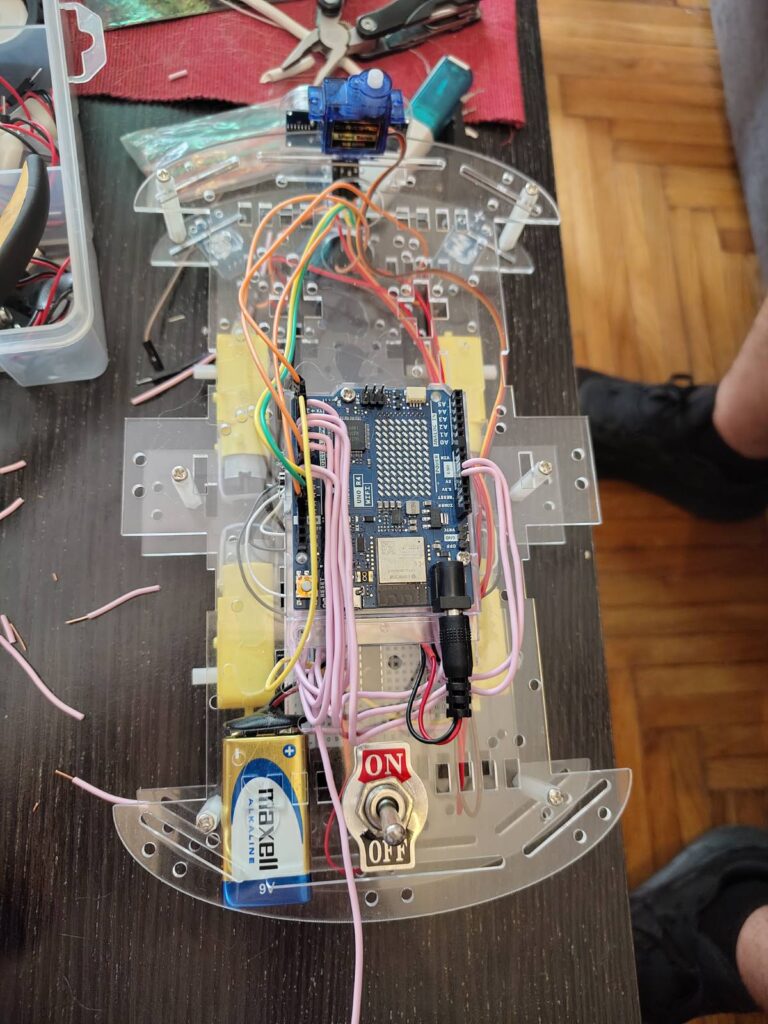
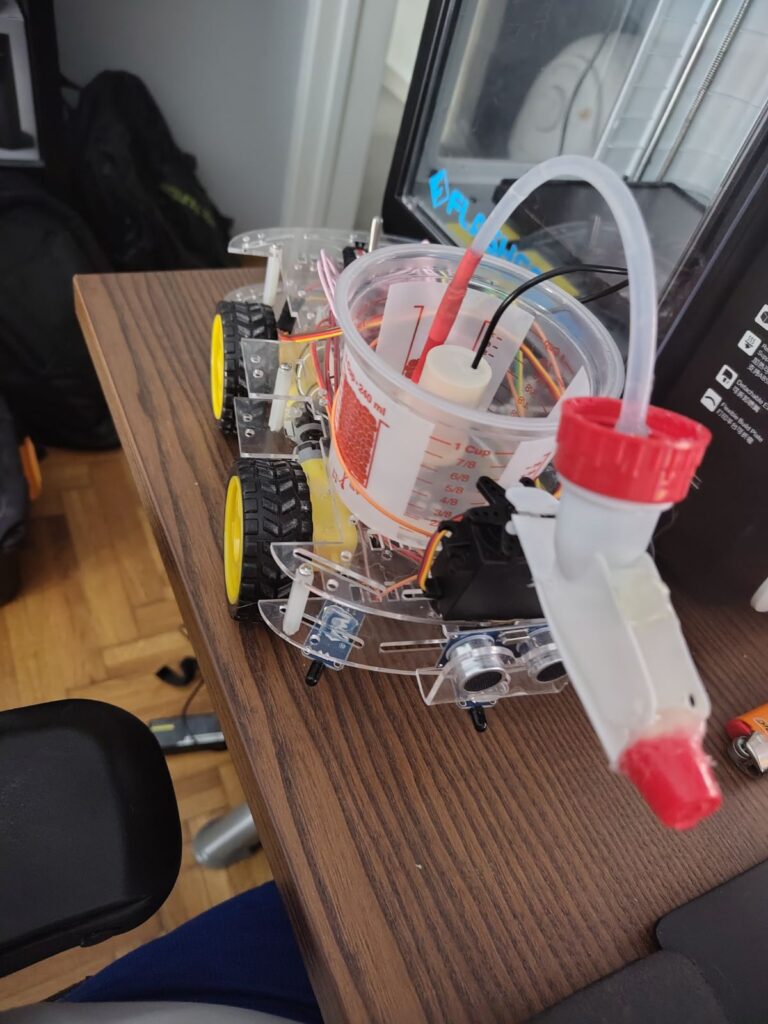
10. Next steps
- Flame confirmation. A single
digitalRead()can twitch on reflections. A short debounce (require flame across two or three reads) would cut false alignments. - Real-world pump tuning. Bump the bulk cap to 1000 µF, and expect to re-tune
SWEEP_DELAYonce a physical hose and real water pressure enter the picture, 300 ms is a simulation starting point, not gospel. - Remote Controlled: Use the Arduino Uno R4 WiFi capabilities to remote control Plitsbot. You need to rewrite the whole code and use the RemoteXY Android application.